This article describes how split automations work and how to use them.
How To Implement Split Automations in Your Prospecting
With split automation, you can test different automation flows to find what works better. For example, you might test which prospecting flow converts more agents. Do my postcard sends bring in more business? Does sending gift cards to agents have an impact on conversions? Watch the video below to learn more!
Split automations allow you to divide an automation into different paths based on certain conditions or evenly. This enables you to track the performance of each path and determine what works best for your prospecting efforts.
For instance, when deciding between sending an email, a text message, or a postcard, split automations can help you identify which tactic is most effective.
Key Reasons for Using Split Automations:
-
Testing different outreach methods.
-
Evaluating the effectiveness of each method.
-
Making informed decisions based on data.
Creating Split Automations - A Walkthrough
Let's go through the process of setting up a split automation:
Prerequisites
Ensure you are on a professional plan, as split automation is a feature exclusive to this tier.
Setting Up The Process
1. Defining Start Trigger: Begin with determining what initiates the automation. A common example could be tagging contacts as "prospecting." 
2. Creating Actions: Next, create the actions that will occur after the start trigger. You might want to split the contacts to test two distinct approaches. 
3. Choosing Split Conditions: You have two choices here: 
What is Campaign Split Testing?
- Allows testing up to five different email variations simultaneously
- Tests can compare subject lines, "From" information, and email content
- Two main testing options are available:
- "Do not determine a winner": Sends variations to equal portions of your list
- "Determine and send using the winner": Automatically selects the best performing version
Testing Variables
- Subject lines and pre-headers
- Email content blocks
- Images and videos
- Call-to-action elements
- HTML vs. plain text formats5
Best Practices for Split Testing
Test Setup
- Create a clear hypothesis before starting
- Test one variable at a time for accurate results
- Ensure sufficient audience size for meaningful data
Measurement Options
- Open rates
- Click-through rates
- Conversion rates
- Unsubscribe rates5
Advanced Features
Automation Split Testing
- Create complex testing environments for email workflows
- Options for even splits or conditional splits
- Ability to set specific conditions and triggers for different paths3
- Comprehensive reporting tools to analyze test results
Conditional Split: The split is based on specific conditions being met before redirecting contacts down a new path. 
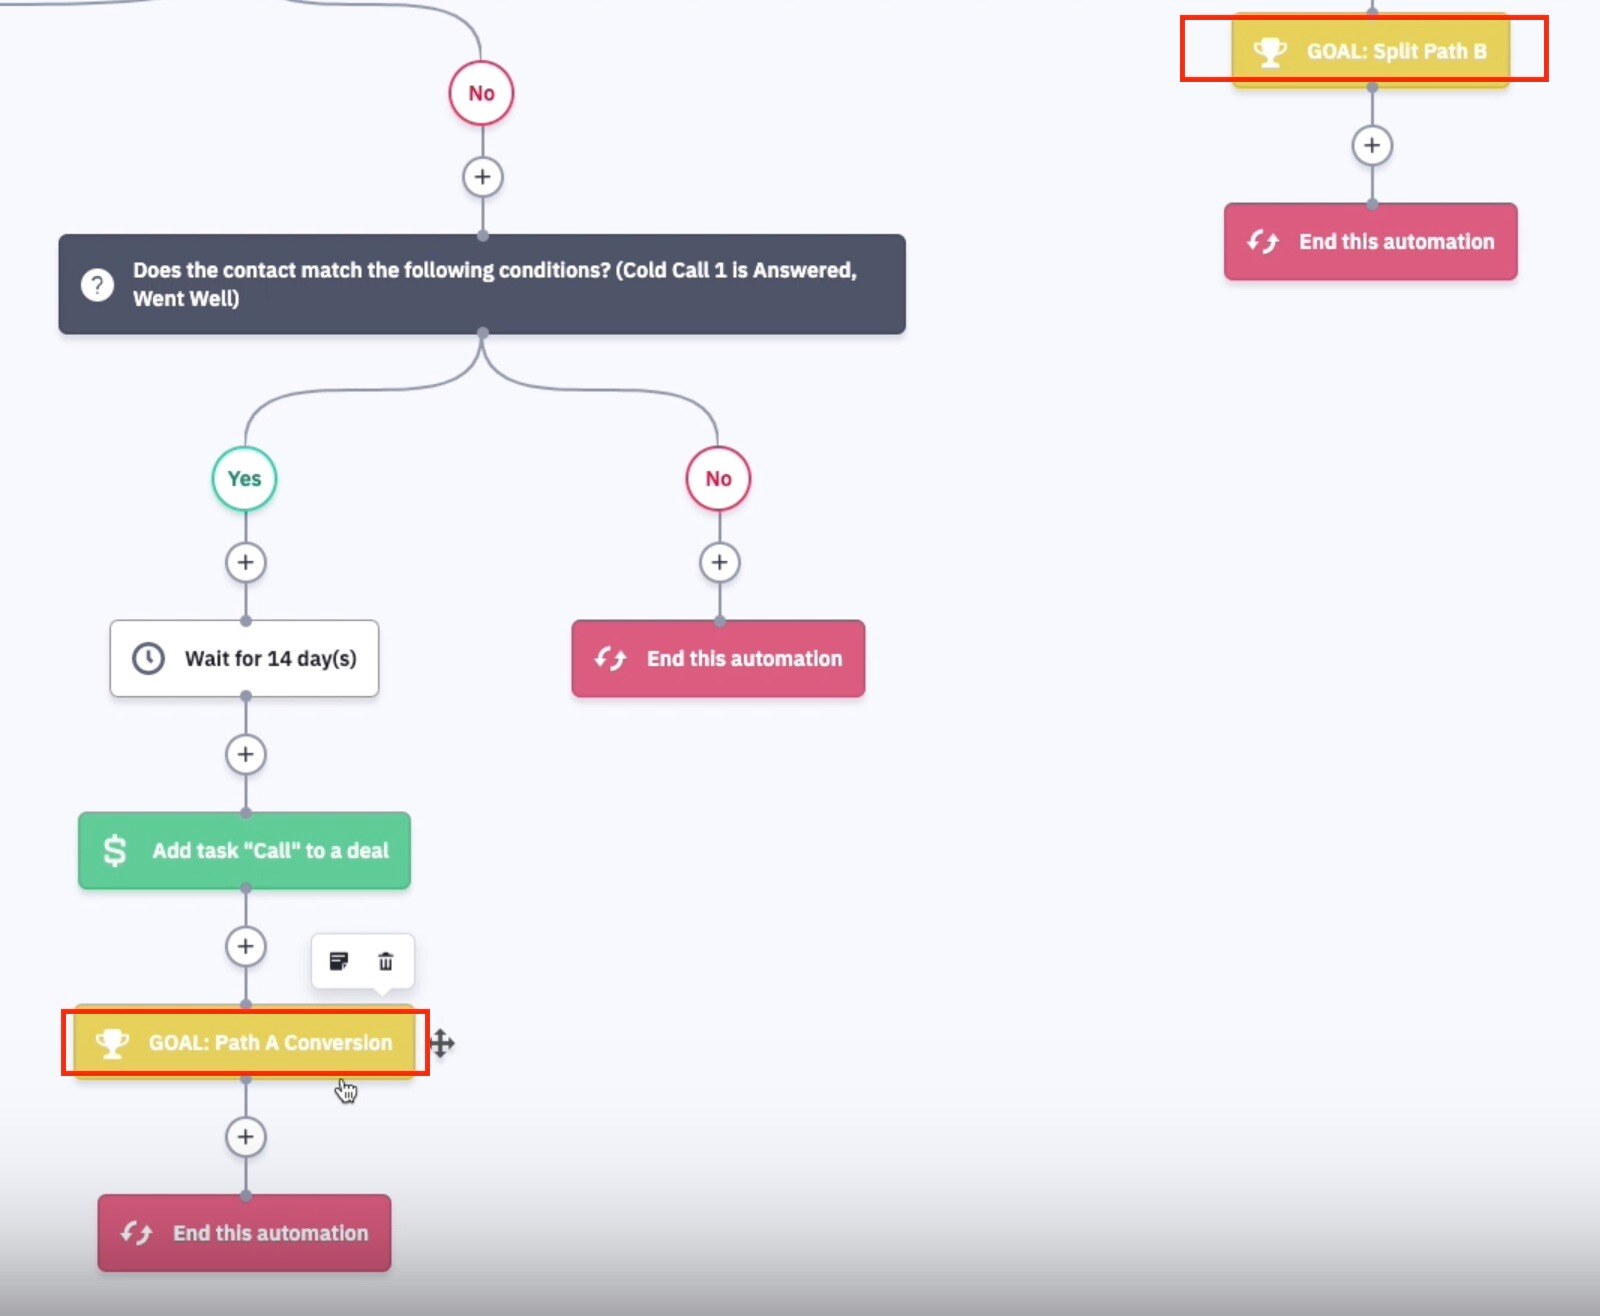
4. Configuring Action Sets: Outline detailed steps within each split. For instance, Path A may focus on phone calls every seven days, while Path B avoids phone calls altogether.
5. Tracking Performance: Set up goals within each automation to monitor which actions lead to desired outcomes like scheduling inspections.

Implementation Tips
-
Conduct split automations continuously to refine your prospecting techniques.
-
Allow ample time (beyond 90 days) for adequate data collection and analysis.
-
If necessary, integrate with external tools such as Google Sheets for additional tracking.
Considerations
-
Professional Plan Requirement: Remember, the split automation feature requires you to be on the professional plan of the respective automation software.
-
Data Analysis Period: Give the split automation enough time to collect considerable amounts of data for accurate analysis.
By utilizing split automations, you can systematically compare different prospecting strategies and adapt them based on concrete data.
FAQs:
-
What is a conditional split in automation? A conditional split directs contacts down different paths based on specific conditions, like contact details or behaviors.
-
How do I set up an even split for A/B testing? Drag the split action into your automation builder and define how you want to distribute contacts (indefinitely, by a specific number of contacts, or until a set date).
-
Can I edit a split action once it’s in progress? No, split actions cannot be edited once they are in progress. Ensure all settings are correct before activating.
-
Why should I set my automation to inactive before editing? Setting the automation to inactive ensures that changes are applied correctly and prevents any disruptions in the contact flow.
-
What are the best practices for using split actions? Use visual aids for better understanding, set clear goals and conditions, and always ensure your automation is inactive before making edits.
