This article will walk you through the steps of receiving notifications when a contact subscribes or unsubscribes from a list.
When contacts subscribe or unsubscribe from your list, you can be notified. This way, you can set a reminder to contact them if necessary.
You can configure these notifications in two ways:
1. List settings
Every list can have its own set up for notifications, which can be sent to any email address you specify. If you manually add a contact to your list, import your contacts using a CSV file, or add contacts to a list using the bulk editor, no notification email will be sent.
When a contact subscribes to your list or clicks a "Unsubscribe" link in a campaign that was sent to the list they are subscribed to, you may want to use this option if you just want to be notified.
Please follow these steps:
a. On the left-side menu, select "Lists" and then select the list for which you want to create a notification.
b. From the list of options, select "Advanced Settings."
c. To receive an email notification when a contact subscribes to your list, enter the email address into the field provided.

To receive an email notification when a contact unsubscribes from your list, enter the email address into the field provided.

d. When you're done, click the "Save" button.
2. Automations
When a contact is added to or unsubscribed from a specific list or any list, you can set up an automation to run. With this option, the notification will be sent regardless of the method of subscription or unsubscription.
This option may be useful if it initiates a workflow that includes customer outreach, adjusting a deal or contact score, and other actions.
a. Select "New Automation" from the Automations Overview page.
b. Select "Start from Scratch," then "Continue."
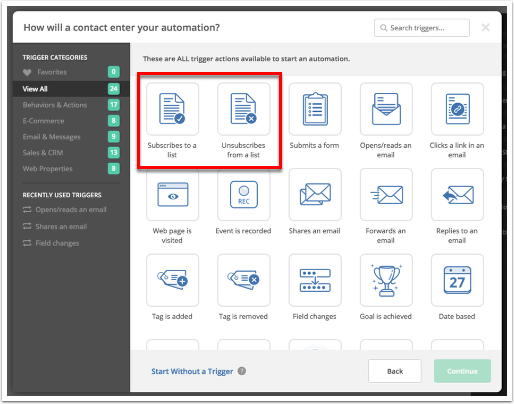
c. Select "Subscribes to a list" to have your automation run whenever a contact is added to your list. Click the "Unsubscribes from a list" option instead to have an automation run when a contact unsubscribes. Then press the "Continue" button.

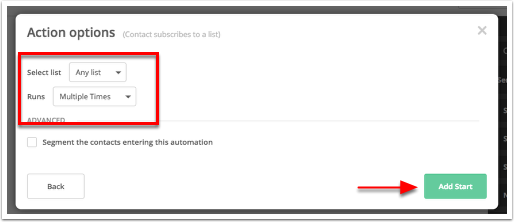
d. A modal window will appear, allowing you to configure your trigger. Select the list for which you want to receive notifications using the dropdowns. You can also choose "Any" if you want to receive notifications for any list.

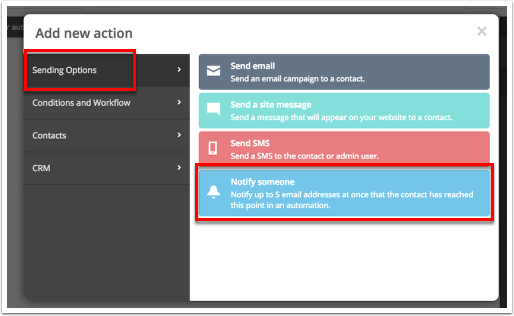
e. The "Add New Action" modal will appear. Under "Sending Options," select "Notify someone."

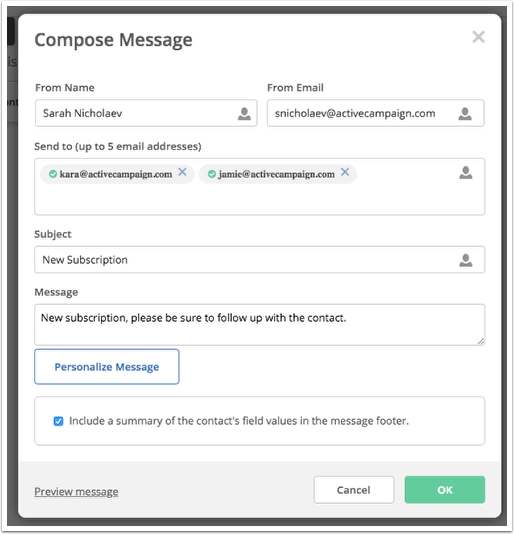
f. The Compose Message modal will appear. Fill in the blanks and click "OK."

When creating this notification, make sure your "To" email address differs from your "From" email address. If they are the same, your notification will not be received.
If your "To" email address has the same domain name as your "From" email address, you will need to whitelist our IP ranges to help prevent deliverability issues.
g. Once you've finished creating your automation, give it a descriptive name and set it to "Active" by clicking "Active" on the top right of your automation.
