The article explains how to update an email in an automation and how to edit an existing email.
Creating a New Automation Email
In this guide, we'll learn how to create a new automation email or make changes to an existing one. Follow these steps to streamline your email automation process.
1. Choose Your Automation
-
First, log in to your account.
-
Select the automation where you want to add the new email.
2. Determine the Placement:
-
Identify the step in your automation where you want to add the new email.
-
For example, you might want to send an email after creating a deal and waiting for a day.
3. Add the Email Step:
-
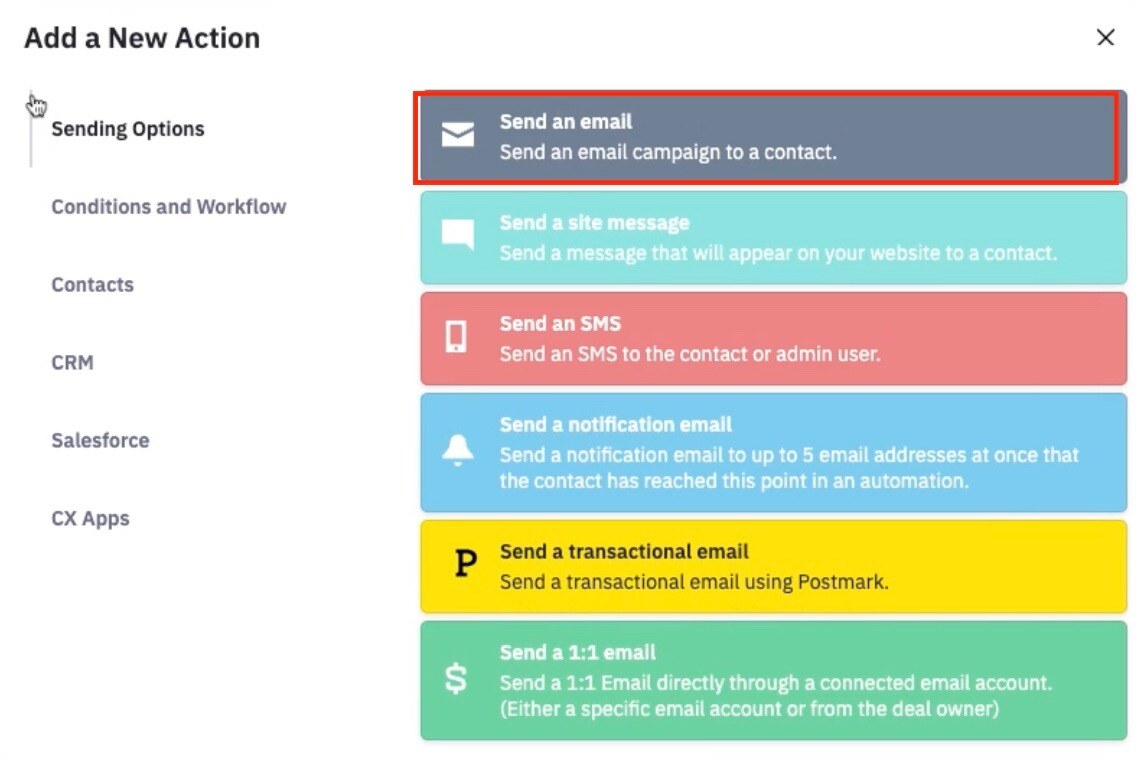
Click on the positive note icon to open a modal window.
-
Choose "send an email" as the action.
4. Name Your Email:
-
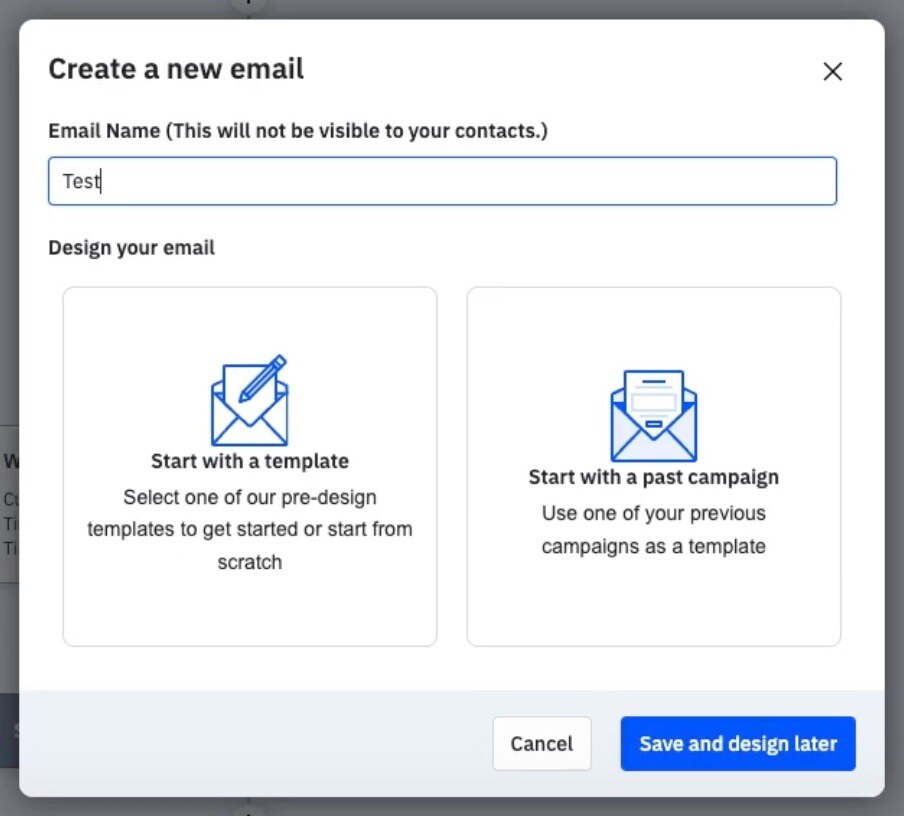
Give your email a name. For this example, we'll name it "Test."
5. Design Your Email:
-
Decide whether to start with a template or a past campaign.
-
For this guide, we’ll use a template. Click on "Start with a template."
6. Choose a Template:
-
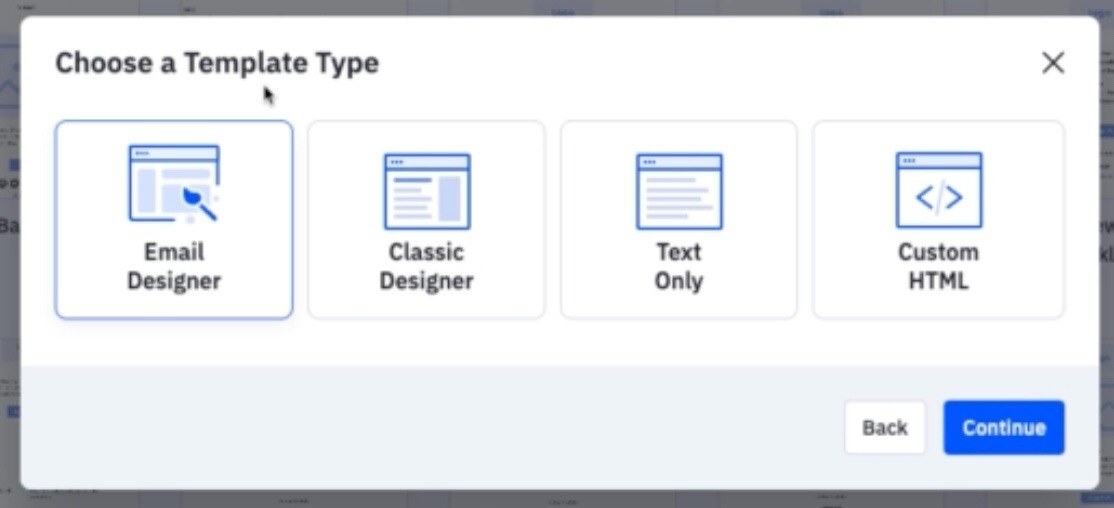
Select from the available template types. We'll use the "email designer" template type.
-
Choose a basic or designed template based on your needs. For a welcome email, select the appropriate template.
7. Set Sender Details:
-
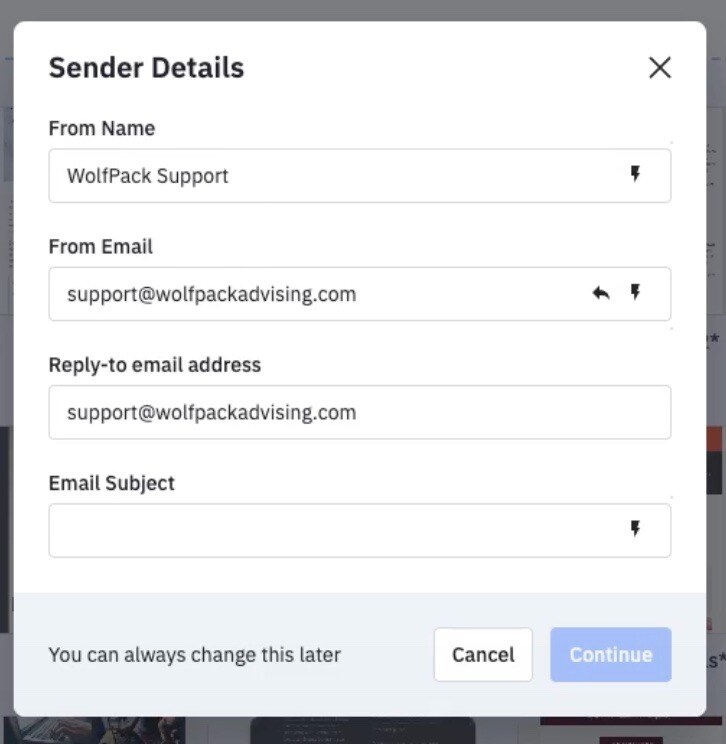
Fill in the sender's name and email address.
-
Specify the reply-to email address.
-
Add a subject line for your email. For personalization, you can insert the recipient’s first name by clicking the personalization icon.
8. Design Your Email:
-
You’ll be directed to the email designer page. Here, you can customize your email’s content and layout to fit your needs.
Editing an Existing Automation Email
1. Select Your Automation:
-
Start by selecting the automation containing the email you want to edit.
2. Choose the Email to Edit:
-
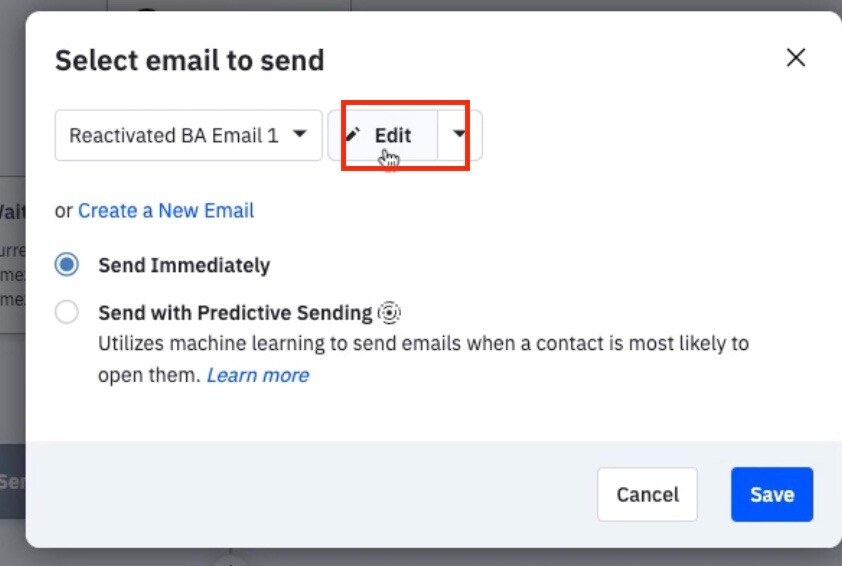
Find and click on the email you want to modify. For this example, we’ll choose "Reactivated BA Email 1."
3. Edit the Email:
-
Click "edit" to open the email in the designer.
-
On this page, you can make all necessary changes. Think of it as opening a design tool where you can adjust everything to your liking.
