An overview of the contacts page.
Contacts General Overview
Learn the basics of the contacts section in WolfPack
What is a Contact?
A contact is defined as a unique email address within your contact management system. A contact can be created with only an email address; no additional information is required. However, a contact cannot exist without an email address.
It is important to note that an email address counts as a single contact regardless of how many lists the contact is subscribed to. Moreover, only active contacts contribute toward your contact limit, ensuring efficiency in managing your contact database.
The Contacts Overview Page
The Contacts Overview is the central hub for managing your contacts. Accessible by clicking “Contacts” from the left menu, this page provides a sortable and searchable list of all your contacts. Here, most bulk contact management activities are performed. The features available on the Contacts Overview page include:
-
Sorting and Searching: Easily find contacts using various filters and search options.
-
Bulk Editing: Modify multiple contacts simultaneously.
-
Multi-dimensional Searches: Conduct advanced searches to identify specific groups of contacts.
-
Contact Records: Access individual contact records for detailed management.
Managing Contacts in WolfPack Advising
Central to the world of marketing automation lies the pivotal role of contacts. The depth of information you can gather and synthesize directly correlates with your understanding of your contacts' communication preferences.
Within WolfPack Advising, there have been valuable enhancements to how you oversee and organize your contact data. This comprehensive guide is designed to take you through the fundamental aspects of contact management while shedding light on some of the latest features we've incorporated. This, in turn, will empower you to maintain a streamlined and efficient contact database
Understanding Contacts
A contact within ActiveCampaign is primarily identified by their email address. While contacts may have additional associated information, an email address is a foundational requirement for contacts to exist in the CRM.
To include new contacts, navigate to the Contacts section. At the top row, you will find the choices to "Export," "Import," or "+ New Contact."

You have the flexibility to import a list of contacts, add individual contacts, or download a list of contacts based on your specified criteria.
To manually include a contact, simply click on the blue "add a contact" button. This action triggers the appearance of a modal window, enabling you to input the contact details manually.
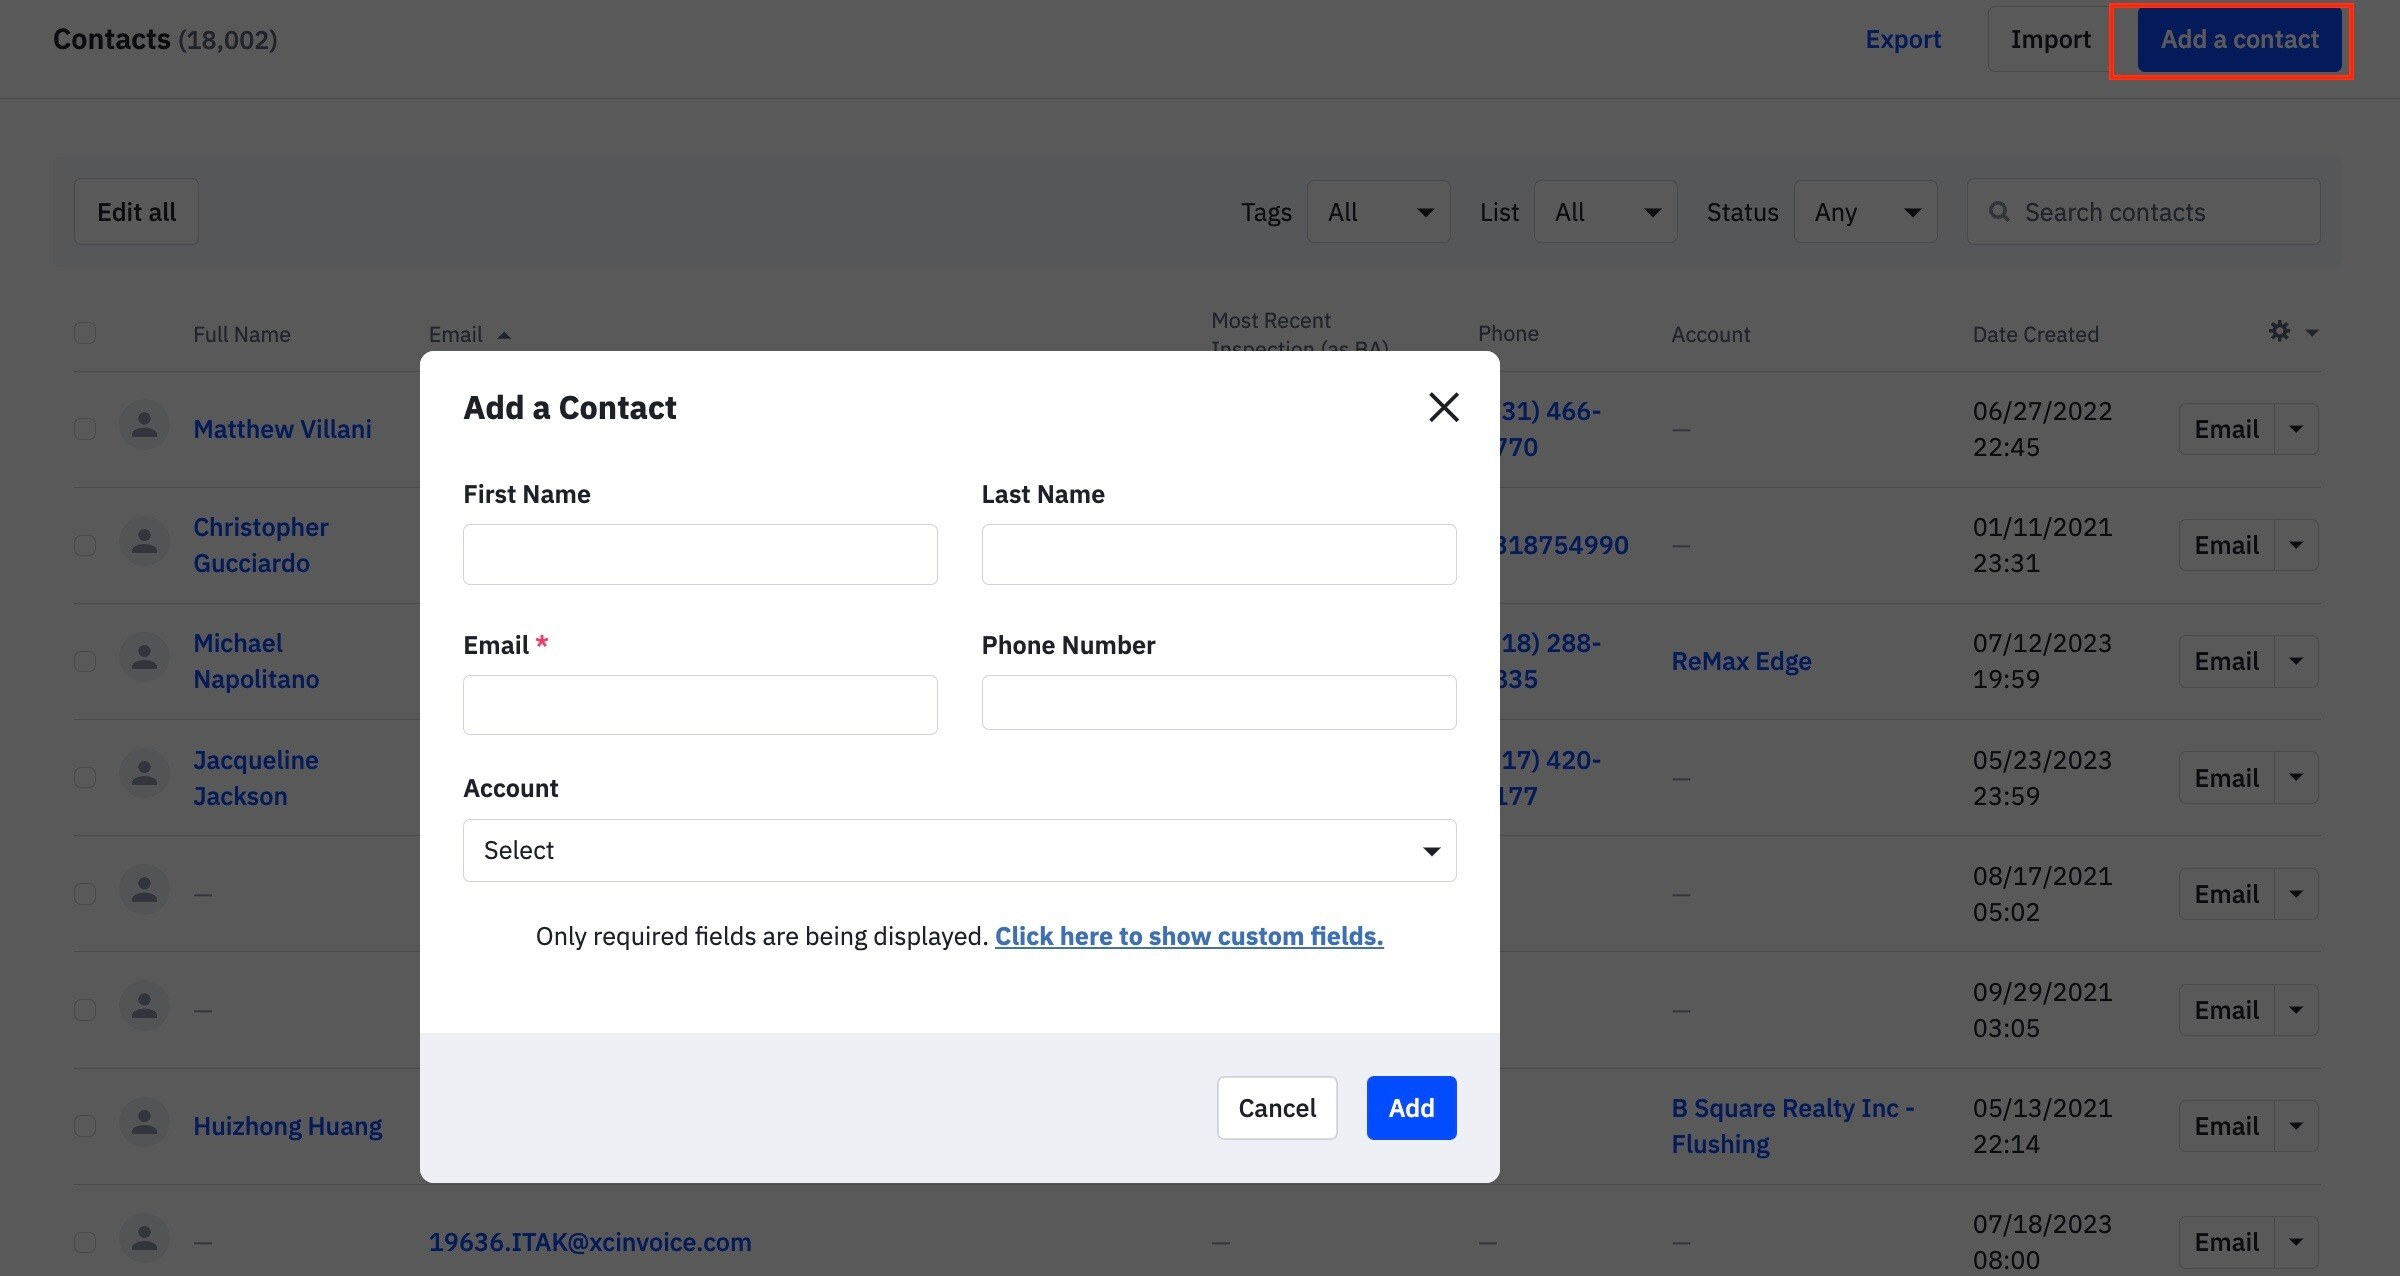
Opting for the "Import" feature provides you with the flexibility to bring in your contacts through various methods, including utilizing a .CSV file, copying and pasting, or reviewing recent imports.


Furthermore, you can establish connections with various services that allow WolfPack CRM to seamlessly retrieve your contact data.
Moving on, you'll see a header. This table view facilitates various actions, such as selecting multiple contacts through checkboxes.

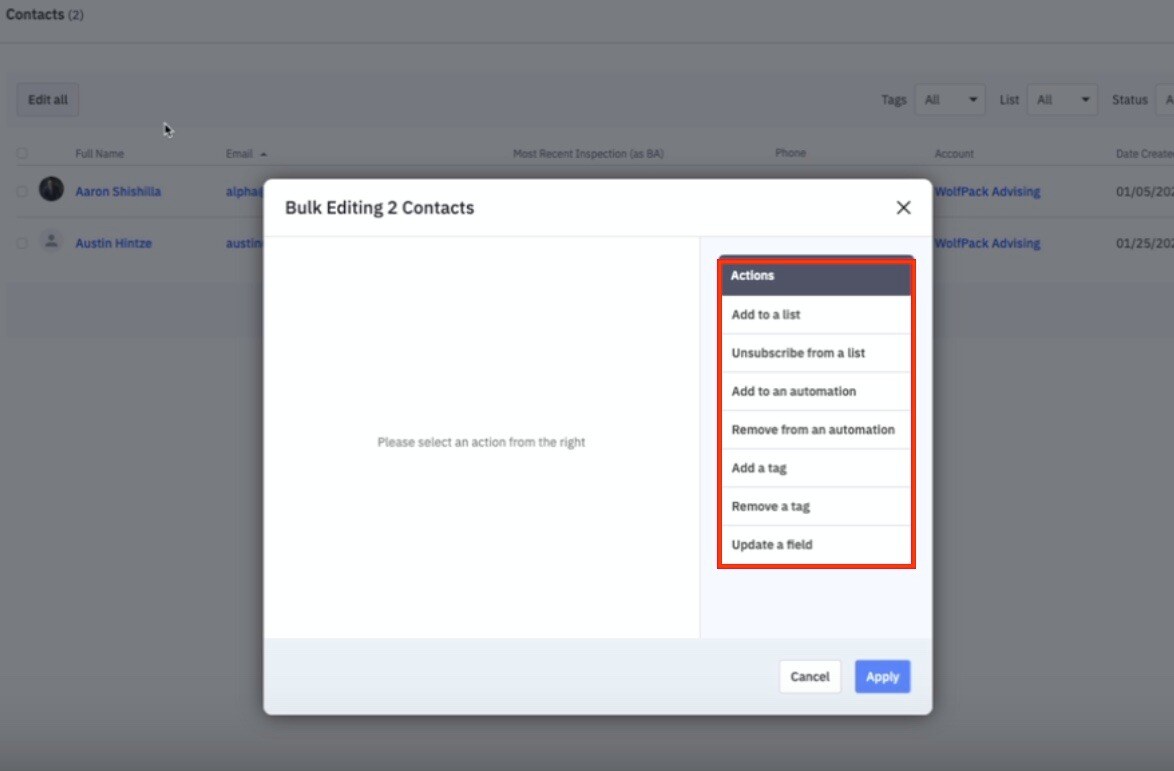
Then you can easily sort through different contacts by a tag, sort through contacts by email list, and sort by the status that they are subscribed to your email lists whether they're active, unconfirmed, unsubscribed, or bounced.


Finally, you can easily search through all of your contacts by searching for something like a phone number, email, or name in the search field.

Alternatively, you can access the Advanced Search option by clicking within the search box. This feature enables you to perform advanced searches on various criteria. You can perform advanced searches based on contact details or custom contact fields, like their birthday.


If you perform an export without entering any search criteria, the system will generate a CSV file containing your complete list of contacts.

However, when you conduct a search and then choose to export, only the contacts within the defined search segment will be included in the downloaded CSV file.
You can also learn more about Advanced Search here.
Filtering, Sorting Your Contact List, and Adjusting Columns
The contact list in the Contact Overview is designed to be highly flexible, allowing you to filter contacts based on several criteria. You can filter contacts by:
- Lists: Identify contacts based on the list they are associated with.
- Tags: Filter contacts by the specific tags they have been assigned.
- Status: Narrow down your list by contact status—whether they are confirmed, unconfirmed, unsubscribed, or bounced.
Moreover, if you need more data at a glance, you can customize the columns displayed in your contact list. This is done by clicking the gear icon in the list's upper right-hand corner. By doing so, you can add or remove columns to suit your specific needs, ensuring that the most relevant information is always at your fingertips.
Quick Search for Individual Contacts
Sometimes, you may need to locate a single contact quickly, whether it's to update their information, remove them from a list, or add them to an automation. The search bar, conveniently located in the upper right-hand corner of the Contact Overview, allows you to do just that. You can instantly pull up their record and take the necessary actions by entering the contact's name or email address.
Using Advanced Search to Find Specific Contact Groups
For more complex queries, the Advanced Search feature is an invaluable tool. This option enables you to locate groups of contacts that meet specific criteria, making it easier to manage and target your campaigns effectively. To access Advanced Search, click into the search field on the Contacts Overview page, and then select "Advanced Search."
The segment builder will appear, offering a variety of conditions you can use to refine your search. These conditions can be combined with AND or OR logic, giving you the flexibility to create highly specific segments. Examples of conditions you can use include:
- Tags: Filter by tags added to contacts.
- Website Interaction: Identify contacts based on visits to particular pages on your site.
- Campaign Engagement: Find contacts who have clicked on specific links in your campaigns.
- Contact Data: Use custom fields and other contact data to refine your search.
- Location: Filter contacts by their geographic location.
- Event Tracking: Search based on events you are monitoring.
- Referral Source: Discover where your contacts were referred from.
- Device Usage: Filter contacts by the device they used to visit your site.
Once you've identified the contacts that match your criteria, you can save the Advanced Search for future use or utilize the conditions to create a new segment, allowing for targeted campaigns tailored to that group.
Contact Profile Page

If we were to click into an individual contact, like the one shown here, you'd find a profile image imported from Gravatar as well as the contact's name. It also displays the associated email address and phone number. At times, you might also come across a social media icon that includes links to their respective social media platforms within this section of the contact's page.
Custom contact fields store additional information about your contacts. The custom fields that make sense for your business may be different than what someone else needs, so we've made custom fields very flexible and you can create unlimited fields.
There are a variety of field types you can use to store different types of data:
You can also click from the Contact Record to manage these fields.

Further down, you'll find a list of general contact fields, including name, last name, email, phone, account (company), job title, and birthday, along with any custom fields specific to this contact.
All these fields are editable, and you can input additional information as needed. Any custom fields, including form fields, are presented as distinct fields within a contact record, enabling you to input specific form data for that contact.
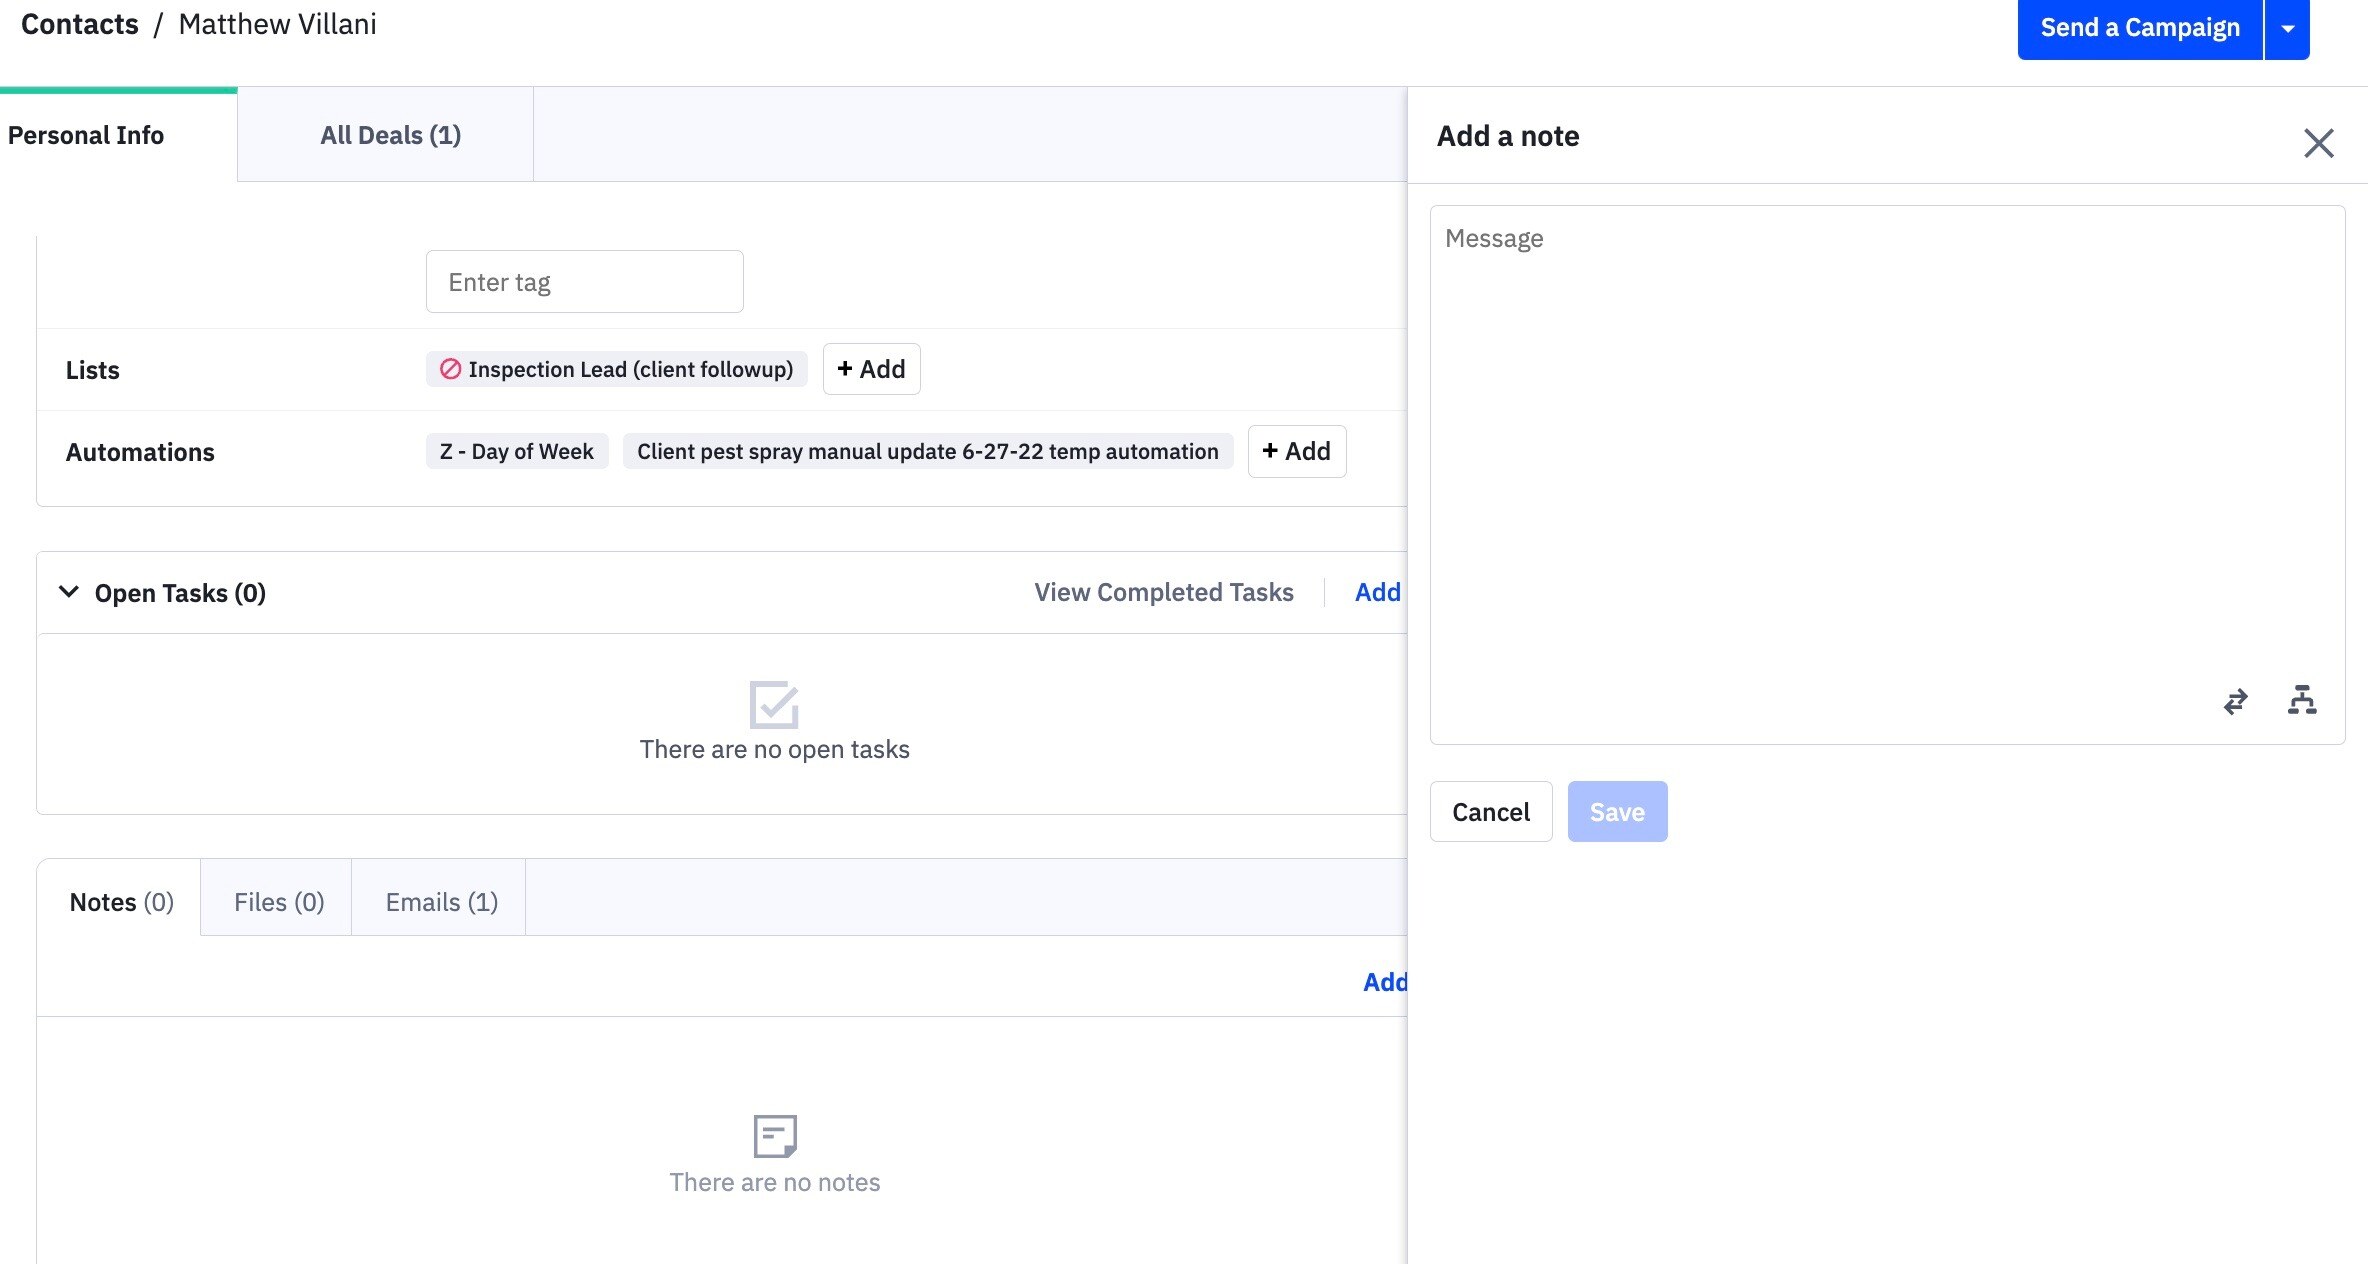
Going down to the bottom of a contact section, we can see tags, which are like labels or filters a way to label individual contacts, the email list they're subscribed to.

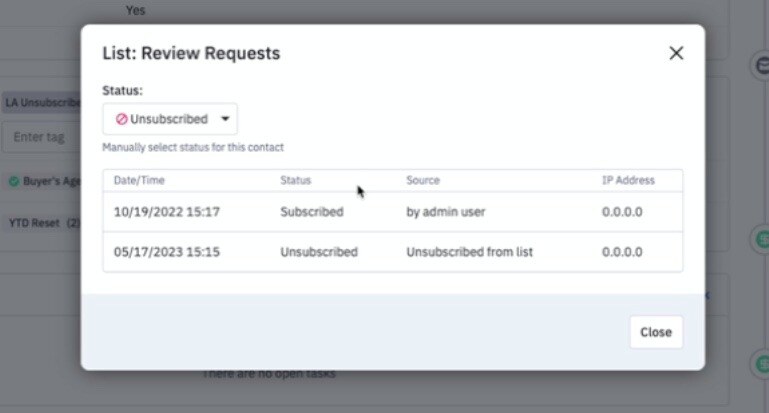
If we click into a particular email list, we can see when they unsubscribed or when they subscribed, unconfirmed, or bounced even the automation that they're currently in.
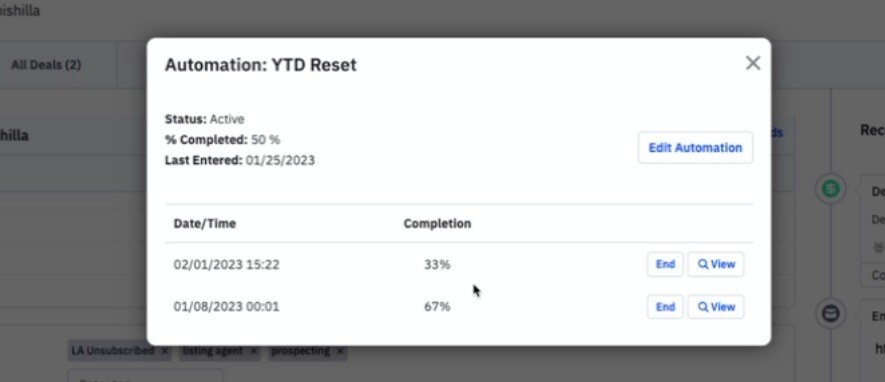
And if we click on a given automation, we can see where they are exactly within that given automation or just in them within that automation itself.
Then we can see any tasks that are given for the individual contact, and we can view completed tasks, or quickly add a task.

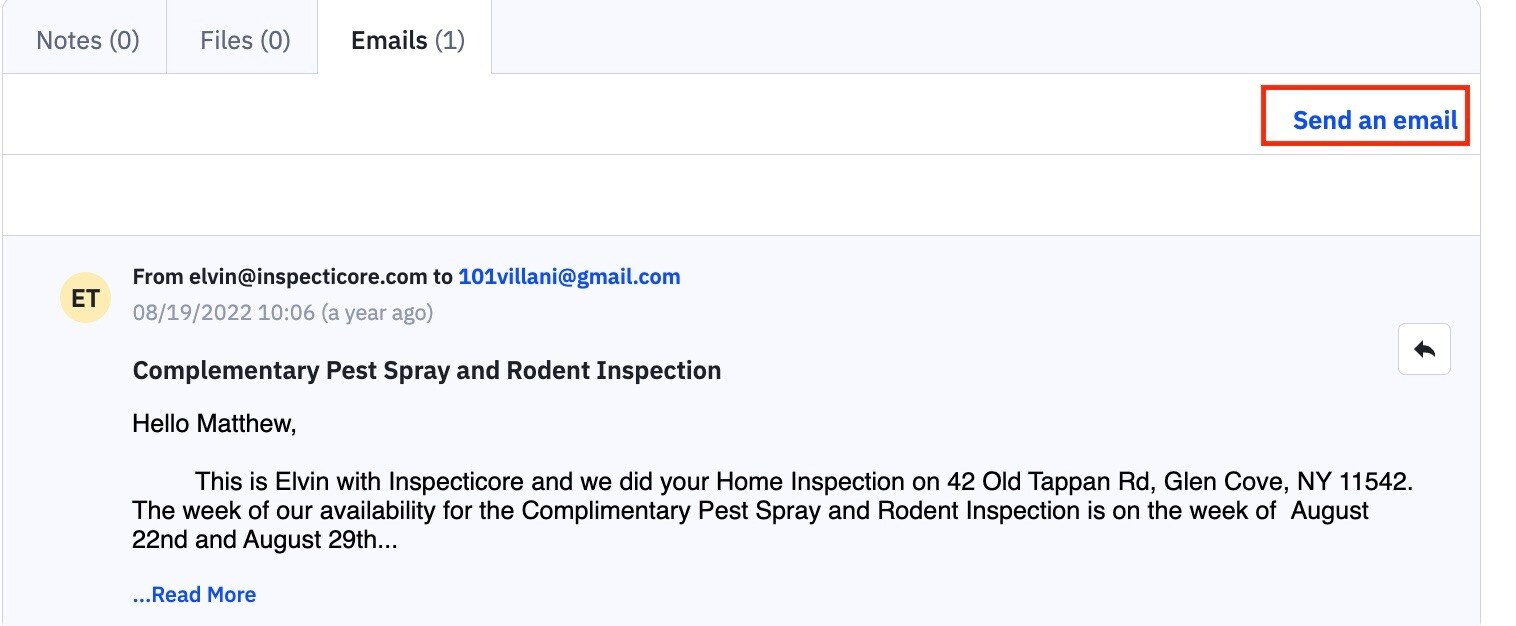
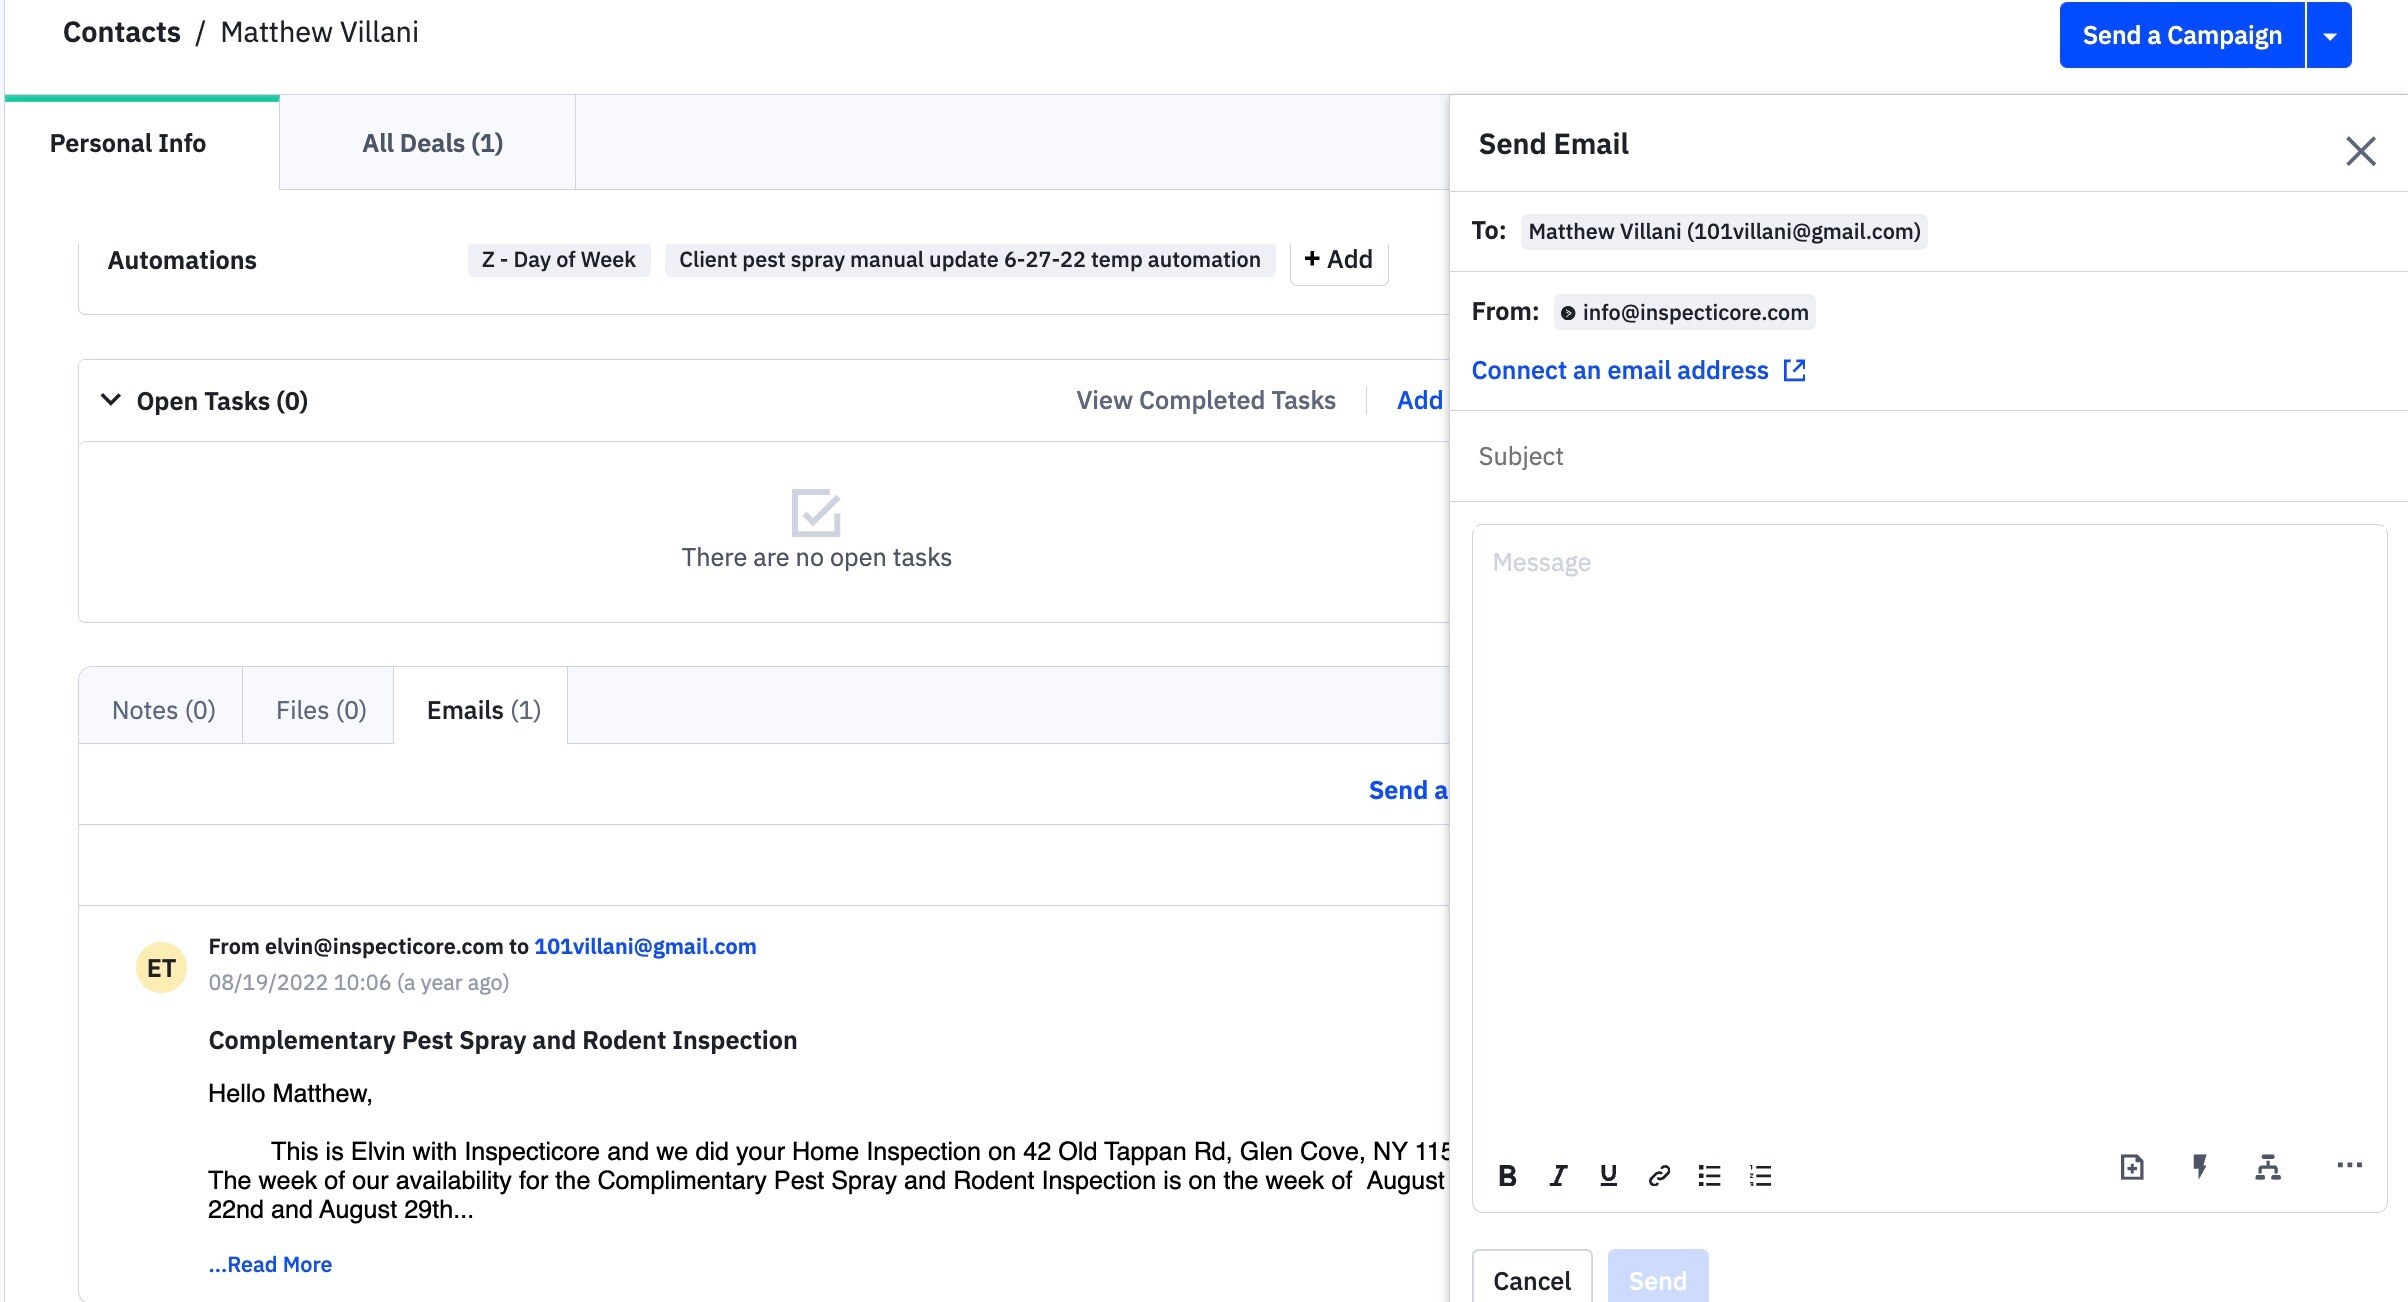
Towards the bottom of the page, you'll find a section that displays any contact notes, attached files, and a history of emails sent to the contact. If you wish to add a contact note or send an email directly to the contact, you can do so in this area located at the bottom right.


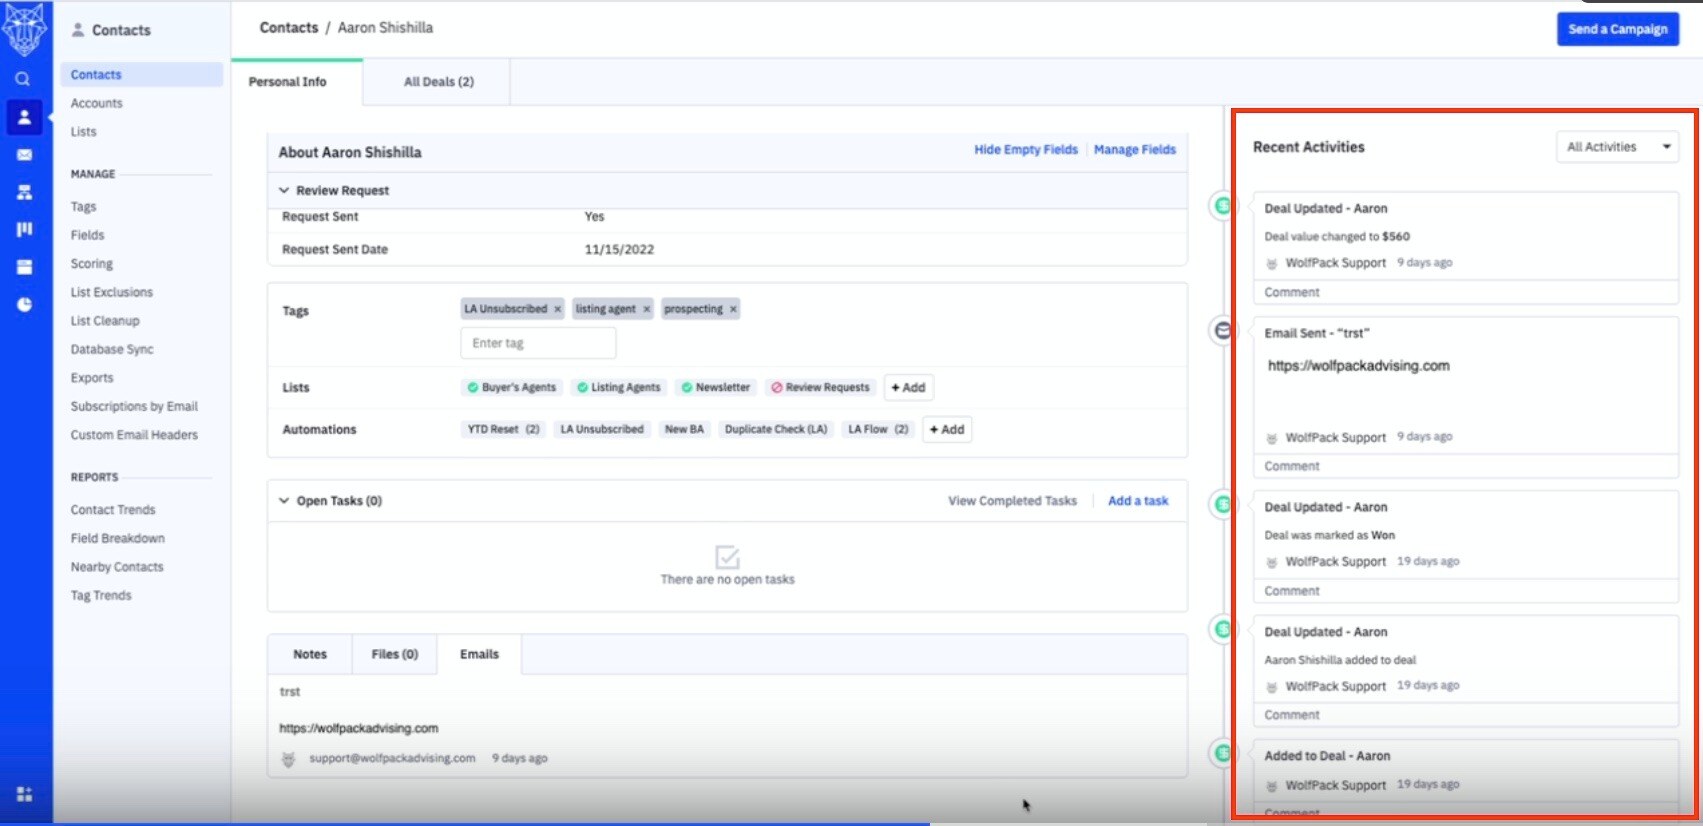
On the right-hand side, you'll find a section dedicated to displaying recent activities specific to the individual contact. This is similar to the dashboard overview, which shows recent activities for all contacts, but here, you're focusing solely on the recent activities of the selected contact. If you need to troubleshoot or gain insights into how the contact entered automation, their current status, or past events, this section provides a detailed record.
At the top, you can access information about any deals associated with the contact.
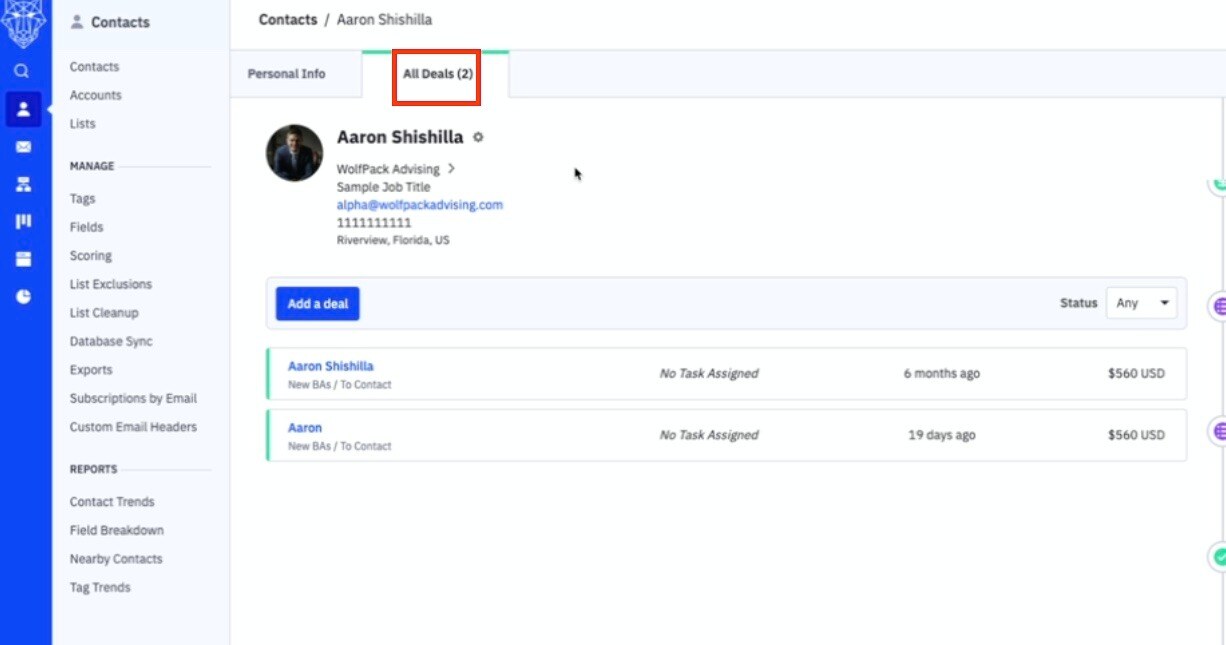
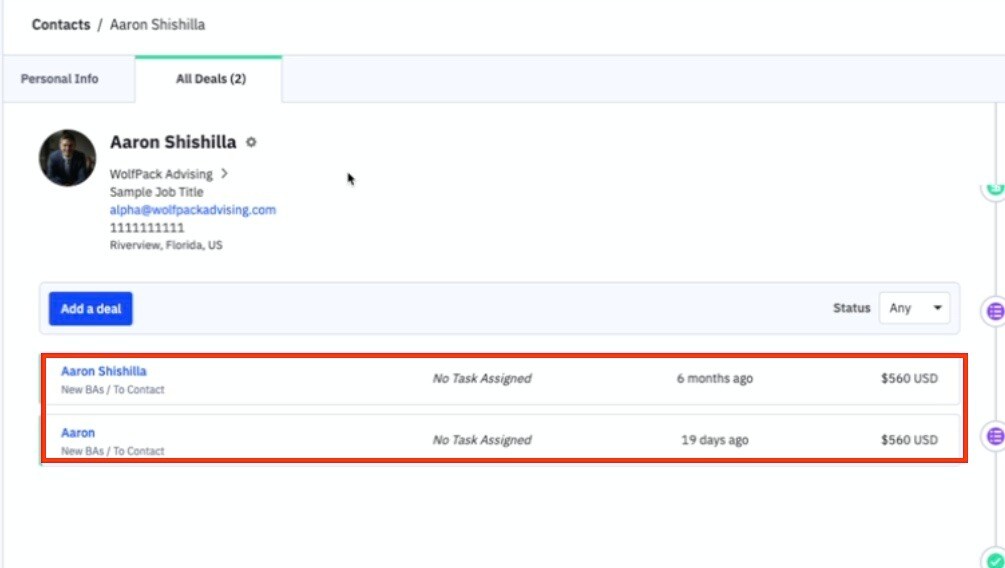
While we won't delve into the details of deals in this contact overview, you can find any deals linked to an individual contact in this tab.
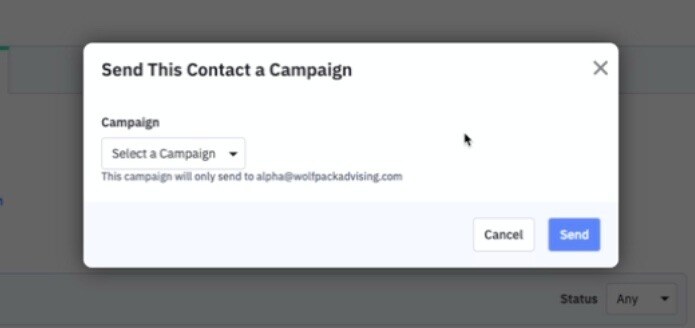
Finally, if you want to send a campaign to an individual contact, you can do so by selecting one here and clicking the 'Send' button. Keep in mind that they need to be subscribed to an email list to receive a campaign email."

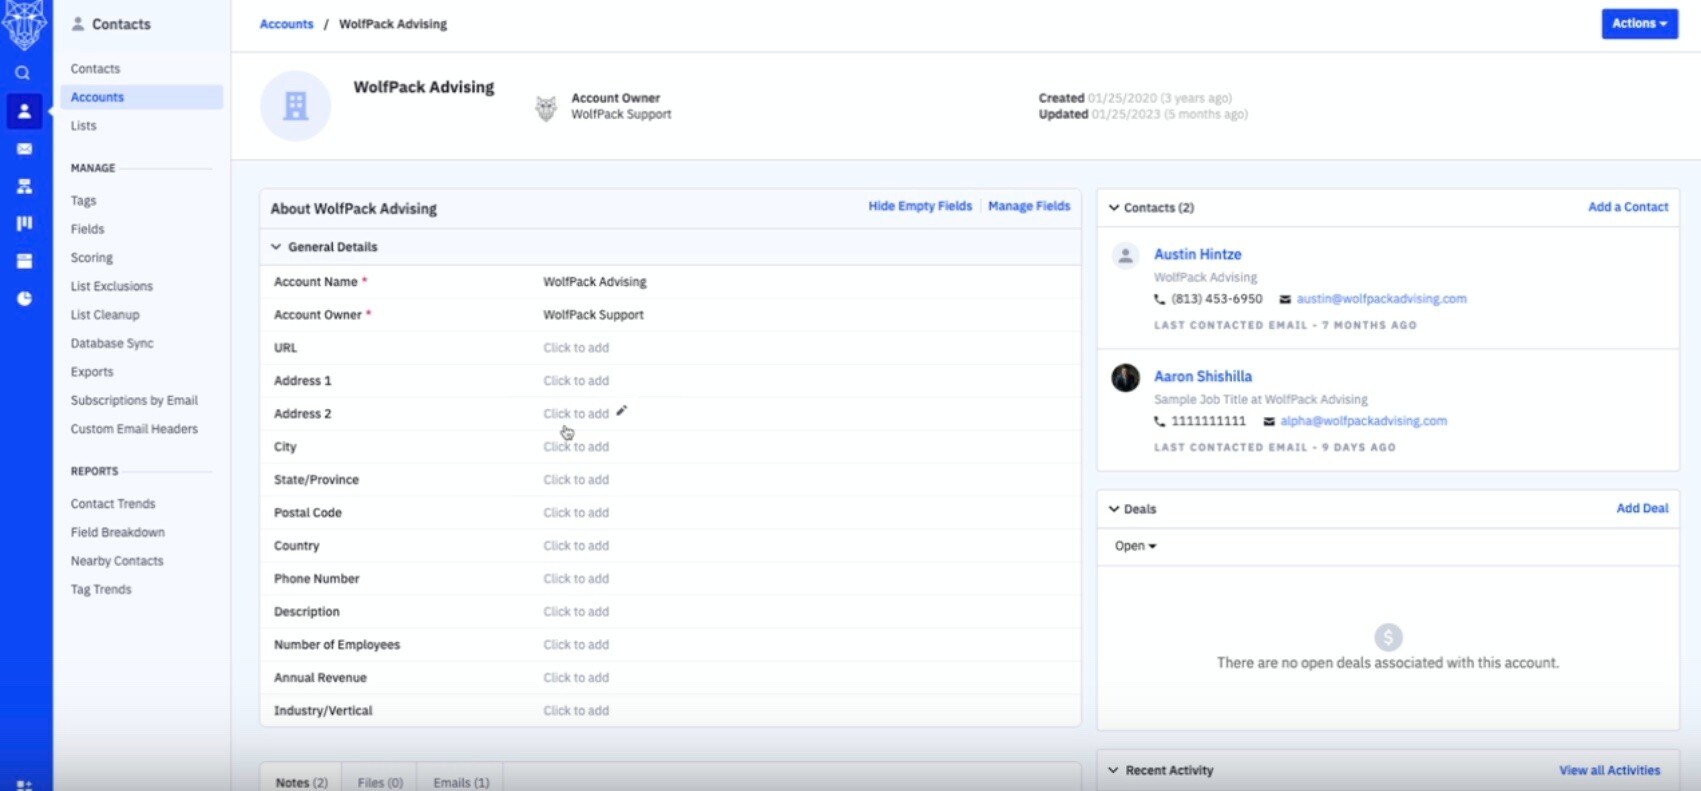
Now, in the 'Contacts' section, you'll also find 'Accounts.' These accounts represent various companies or agencies that you engage with. If your marketing strategy involves business-to-business interactions, you'll list all the different businesses you're working with or targeting here. Think of accounts as similar to contacts, but they pertain to different companies.

For example, if we click on 'WolfPack Advising,' we can access all their general information and the custom fields specific to this account. You'll find details, notes, files, and emails related to this particular company. This includes when the account was created and last updated, the contacts linked with this company or account, any ongoing deals, and recent activities – much like you'd see for an individual contact. The key difference here is that this information pertains to the company as a whole, and you can have multiple contacts associated with a single company, whether it's two, five, or even ten.
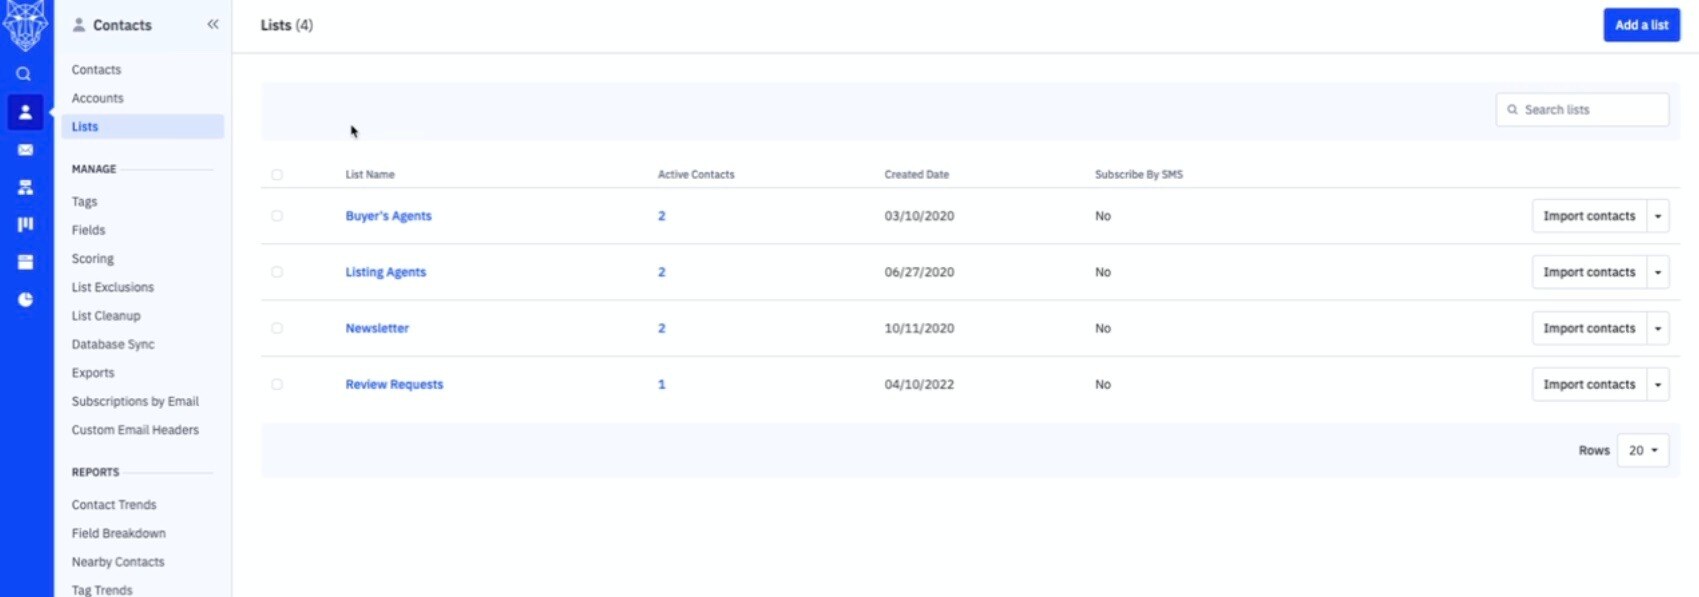
Moving on, we come to the 'LIST' tab. Here, you can create a new email list by providing a name, list URL, and a brief description of the list.
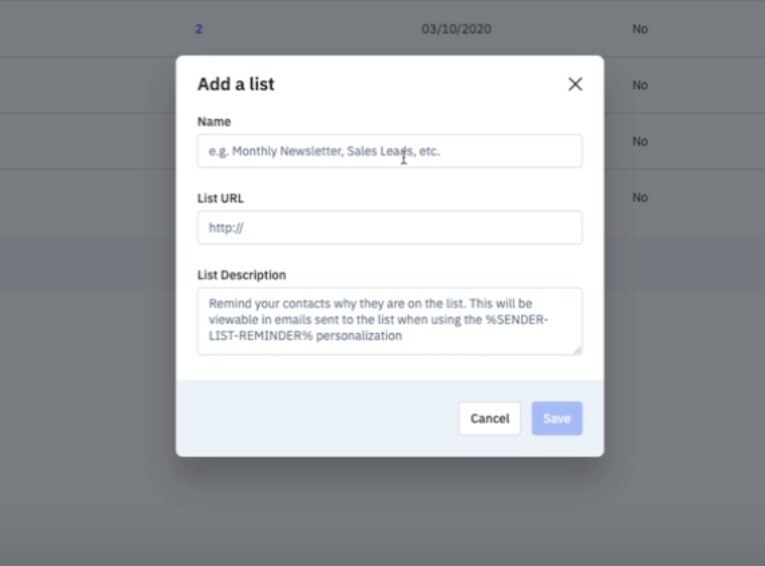
The 'Name' is for your internal reference, the 'List URL' is essentially your website's address, and the 'Description' serves as a reminder for the context of why individuals are on the list, making it visible in emails and during the unsubscription process.
However, if you wish to see a list of all your email lists, including their creation dates, import contacts, or perform specific actions related to particular email lists, you can do so from this dropdown menu.
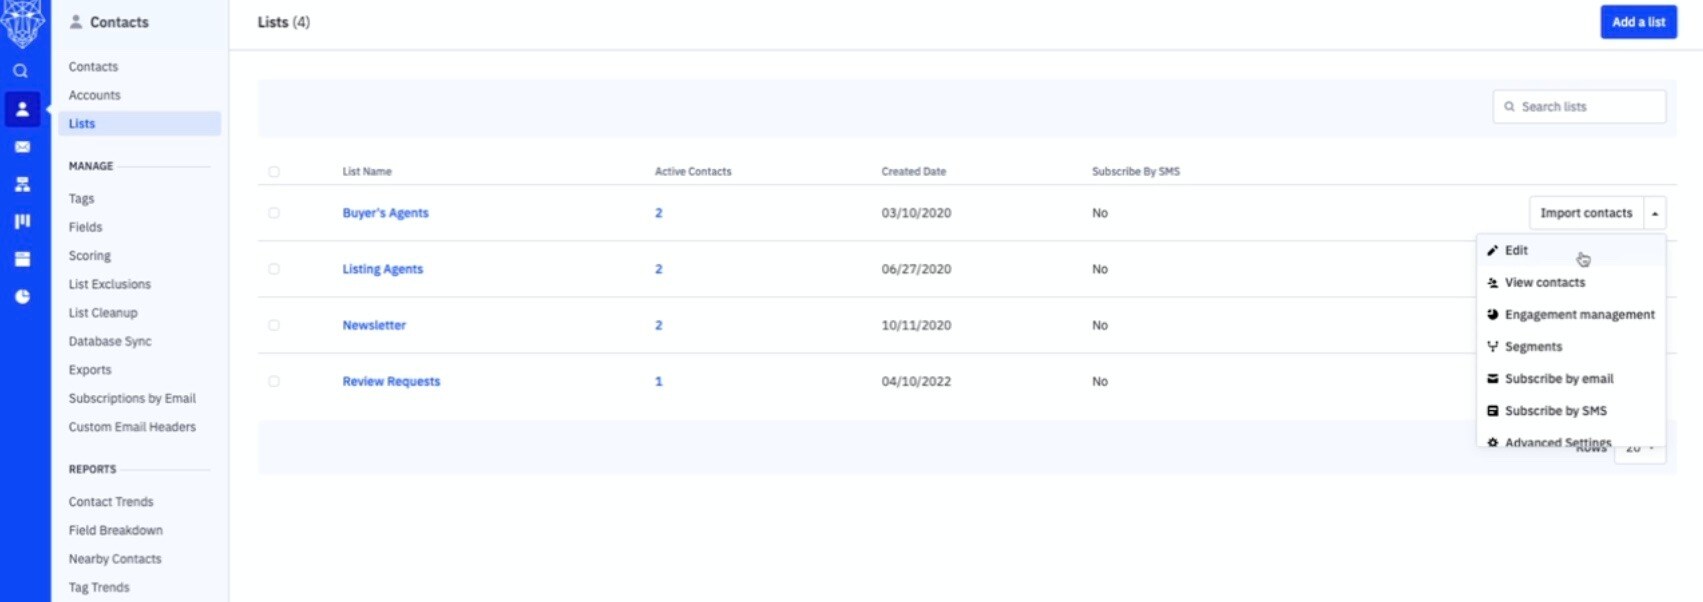
It's essential to understand that clicking on a specific email list will simply redirect me to the Contact tab, displaying the individual contacts categorized under that particular email list, as demonstrated earlier.
Contact Scoring: Prioritize Your Leads
Contact scoring is a strategic tool for assigning numerical values to your contacts. These scores help determine a contact’s:
-
Fit for Your Product: Assess their potential as a customer.
-
Level of Engagement: Identify highly engaged leads for prioritization.
This feature is valuable for both marketers and sales teams, aiding in lead segmentation and personalized engagement strategies. Manage scores by clicking “Scoring” from the Contacts Overview page under Manage.
Database Sync: Import Contacts Effortlessly
Database Sync simplifies the process of importing contacts from external databases such as MySQL, MSSQL, or PostgreSQL. This tool ensures seamless integration and access to your complete contact database.
To use this feature, click “Database Sync” from the Contacts Overview page under Manage.
Manage Exclusions: Refine Your Email Lists
Certain email addresses or domains may not align with your business goals or email strategy. The exclusion feature allows you to:
-
Block specific email addresses or domains.
-
Prevent emails from being sent to excluded contacts.
Access the Exclusions List by clicking “List Exclusions” from the Contacts Overview page under Manage.
Removing Unengaged Contacts
Maintaining a clean and active contact list is critical for healthy email engagement rates. Use the “Expedited List Cleanup” automation to remove inactive contacts efficiently. Regularly cleaning your lists improves deliverability and boosts overall open rates.
Effective contact management is the cornerstone of successful email marketing and customer engagement. From organizing contacts with tags and custom fields to leveraging advanced tools like contact scoring and database sync, these features enable streamlined operations and enhanced targeting. Regular maintenance, such as removing unengaged contacts and managing exclusions, further ensures your database remains effective and actionable.
By mastering these tools and practices, you can optimize your contact management strategy and achieve superior marketing results.
